One-stop supplier for all kinds of formwork and construction materials.

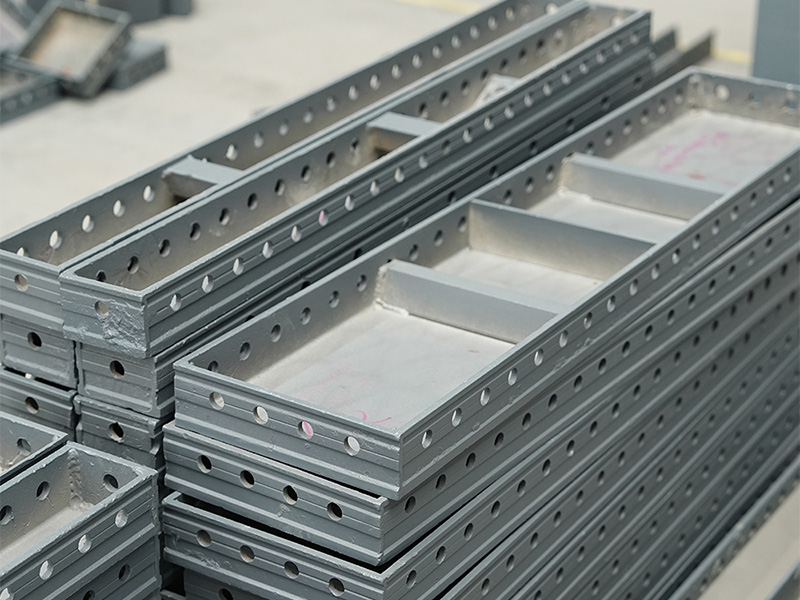
Lightweight Aluminum Concrete Formwork Panel for High-Rise Building Construction
For Sale | 6061-T6 Alloy | usd4500/t | MOQ 100
width * height mm
400*2600mm
300*2650mm
200*2650mm
100*2650mm
weight kg
22.65kg
18.50kg
13.15kg
8.45kg
Aluminum Formwork: From Workshop to Pour — The Last Step Before Concrete Takes Shape
What It Actually Is
Aluminum formwork breaks down into two parts: aluminum alloy profiles and the matching bracing components. The profiles are 6061-T6 or 6082-T6, with tensile strength above 240 MPa, anodized on the surface, and thickness ranging from 3.5 mm to 4.5 mm. Bracing components include tie rods, pins, walers, support props, and diagonal braces — together they lock the formwork into a rigid box.
It replaces timber formwork and steel formwork. Timber turns over five or six times before it’s scrap, surface flatness is poor, and the concrete needs a second plaster coat after stripping. Steel is heavy — a 1.2 m × 2.4 m panel weighs over 70 kg, eats up crane time, and can’t be handled manually. Aluminum is light — same dimensions, under 30 kg. Two guys can carry it, cutting crane lifts by half.
Design: Every Millimeter on the Drawing Counts
Aluminum formwork isn’t plug-and-play. When the structural drawings land on the formwork supplier’s desk, the technical team re-lays the entire panel layout. It’s not just “slice the drawing into panels” — there are hard constraints:
1. Standard panel ratio. In a formwork set, standard panels (regular dimensions, no openings) must account for over 70%. The rest are custom panels. Standard panels have high turnover; custom panels only fit specific positions and don’t cycle as many times. During design, push standard panels toward the middle units and custom panels toward the end units.
2. Kicker board placement. The kicker board is the section left embedded in concrete for the next-level connection. Height, wall face, and fixing method — all locked in at the design stage. Get it wrong, the upper-level panels won’t align, and the site crew will be chiseling.
3. Early stripping system. 24 to 36 hours after pouring, when concrete strength hits 1.2 MPa, you can strip the panel faces while leaving the props in place. Nail this window, and formwork cycle time drops from 7 days to 4. Design must mark which panels are early-strip and which are late-strip.
4. Door and window opening reinforcement. Panels around openings take concentrated pressure and tend to bulge. Design calls for cross-shaped walers or dedicated opening reinforcement frames. These braces can’t clash with the main beams, or they won’t fit.
Production: Tolerance Is Everything
The production floor runs two lines: profile cutting and welding. Profiles come in and hit the saw first — cut to design length, tolerance within ±0.5 mm. Cut stock moves to the punch for pin holes and tie-rod holes, hole position deviation capped at ±1 mm.
Welding is the critical step. Aluminum’s high thermal conductivity means big thermal distortion during welding — panels warp easily after the bead. Experienced welders use skip welding: tack first, then stitch-weld in segments, letting each section cool before moving on. Welded panels go onto a straightening bed and get pressed flat with a hydraulic press — flatness held to 2 mm per meter.
Finally, pre-assembly. The full floor of formwork goes up in the factory, with the client and contractor on site for sign-off. Key checks: are internal and external corners at 90°? Are panel joints under 1 mm? Do pins slide in and out easily? Do tie-rod holes line up? Problems get fixed on the spot, reassembled, and rechecked — until what’s standing matches the BIM model.
On-Site Installation: 30% Panel, 70% Assembly
Once formwork hits site, the install sequence is fixed: walls first, then slabs; interior first, then exterior. The crew follows numbering — one panel, one position. Install the wrong one, pull it out, and the pin holes on the edge deform. Reinstalling it, it’ll be loose.
Trouble spots during installation:
– Corner panels. Two panels hinged together. On-site angle fine-tuning relies on the hinge’s adjustment bolt. Use a spirit level while adjusting, lock it down after — otherwise concrete pressure pushes it off.
– Stair panels. Stair formwork is the oddest of the odd shapes — tread height and width must be spot on. Install bottom to top, adjust each step as you go, then brace rigid with steel tubes to prevent float during pouring.
– Slab step-downs. Bathroom and balcony slabs sit 50 to 100 mm lower than the living room slab — these need suspended formwork. The support props for suspended formwork must be independently braced; never rest them directly on the formwork below, or they’ll sink.
Stripping: Do It Right, Use It Again
Stripping timing depends on temperature. Summer: 24 hours. Winter: 48 hours. Strip early-strip panels first, then non-load-bearing panels, then load-bearing panels last. Stripped panels don’t get tossed on the ground — they get stacked on timber bearers, panel face up, to prevent edge damage.
After stripping, clean off the residue. Scrape concrete with a putty knife — no hammering. Clear cement out of pin holes with a dedicated hole cleaner. Leave cement in there, and next time the pins won’t go in.